

1. Transfer Tickets Between Events
Occasionally, you may need to transfer some or all of the tickets from one performance or event to another. Rather than doing this individually, you can transfer them in a batch by using the wizard on the Attendance tab of the Event setup. This can be helpful when:
- You have cancelled a performance and need to re-seat patrons in a performance in a DIFFERENT venue
- You need to transfer people into a HOLD or WAIT LIST performance
- You need to merge tickets from two performance together
- Anytime a mass re-seating of patrons is required
On the Attendance Tab of the event you are transferring from, select the tickets you want to transfer.
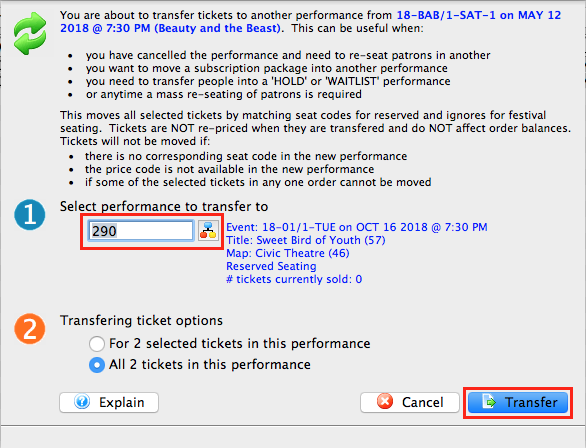
Click on the transfer button at the bottom of the window.
On the pop up screen, select the new performance that you are transferring the tickets to, then click Transfer.
The transfer function moves all selected tickets by matching the seat codes for reserved seating events (festival seating events cannot be transferred in this fashion). Tickets for festival seating events will need to be manually exchanged. Tickets are not re-priced when they are transferred and do not affect order balances.
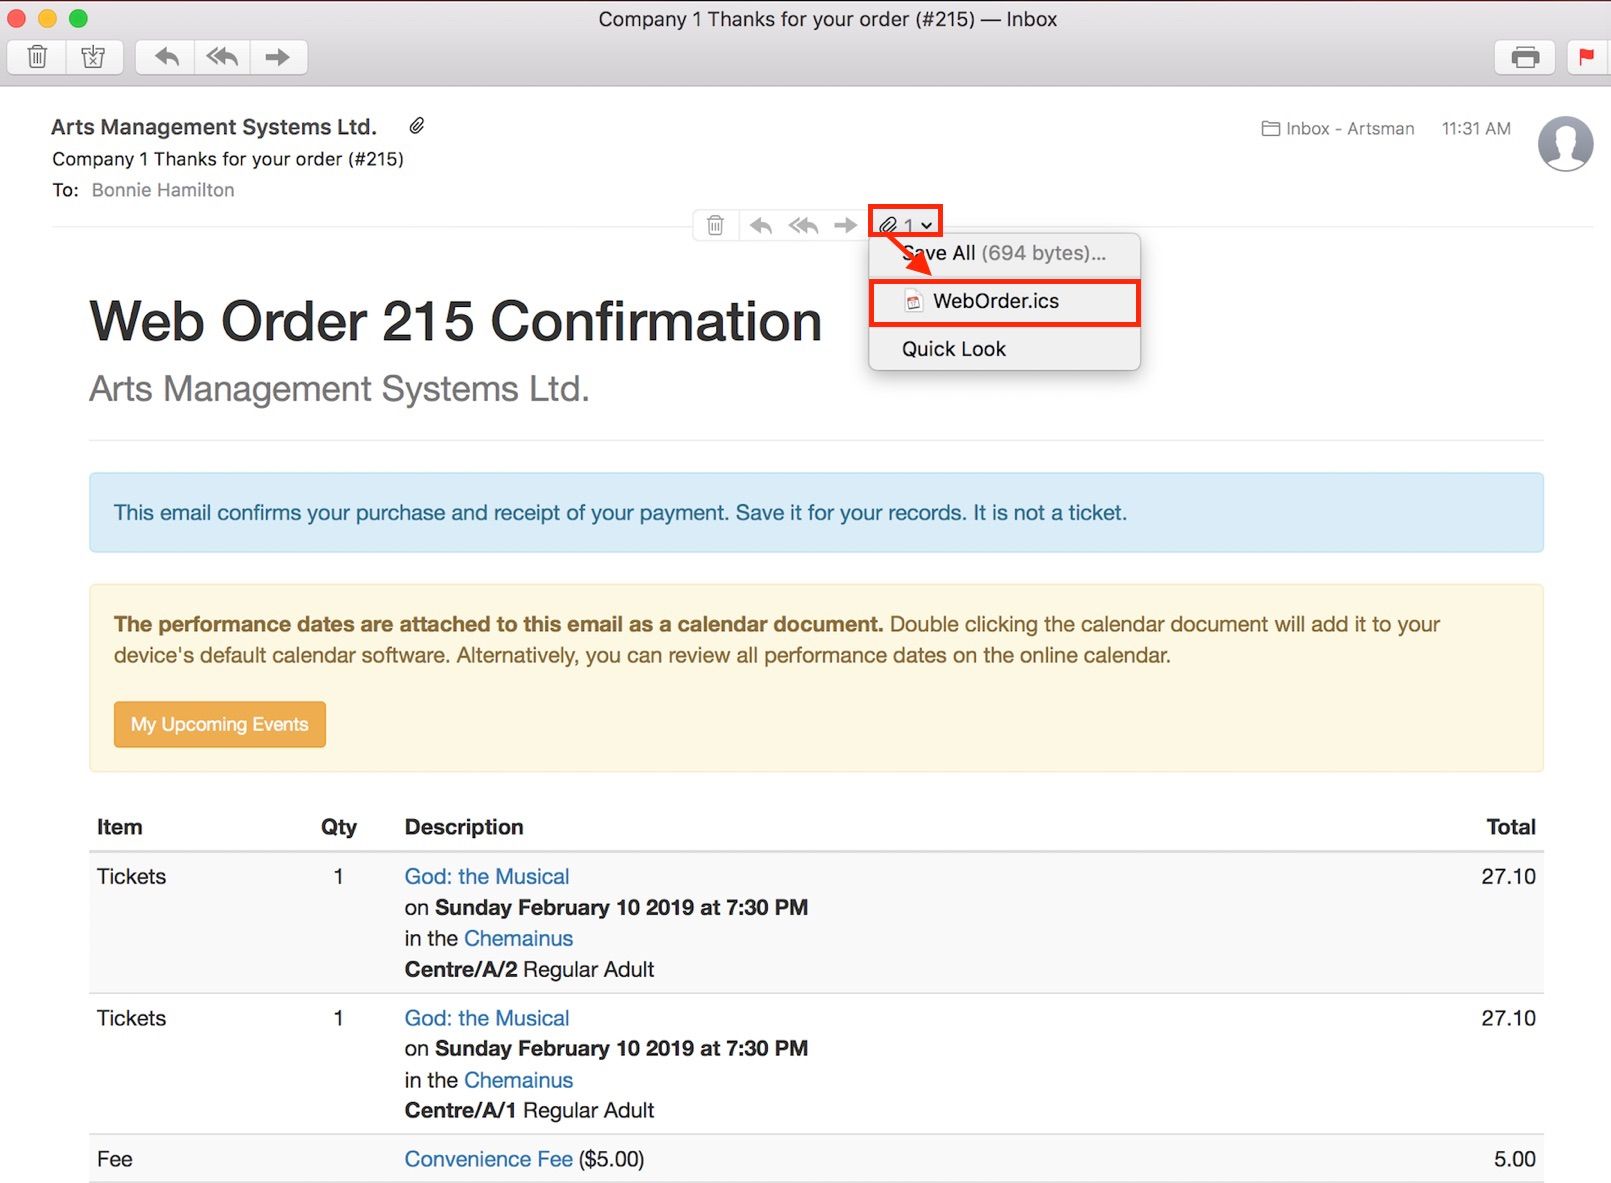
2. Providing Patrons with a Calendar Containing Performance Times With Purchased Tickets
There is a new feature in Theatre Manager as a part of all outgoing Order Confirmations that will send the patron their performance dates as an .ics attachment. The patron can then double-click on the WebOrder.ics link at the bottom of the email or use the attachment feature in their browser to add their ticket purchase details directly to their device’s calendar software.
This feature can be disabled in Company Preferences.
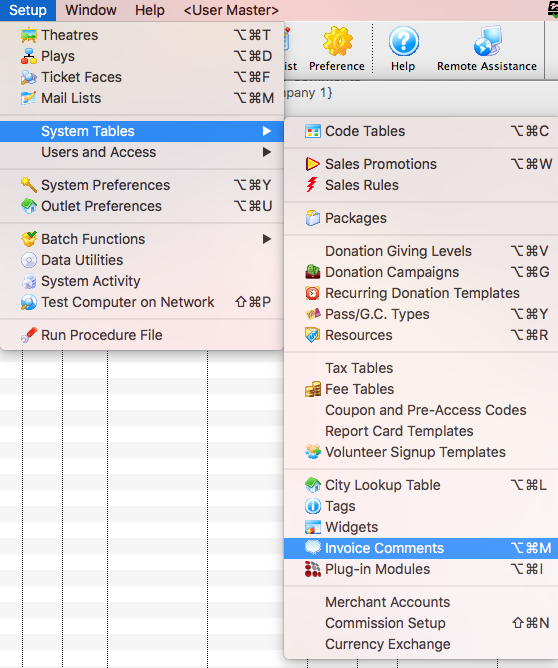
3. Adding Invoice Comments
In Theatre Manager, Invoice Comments are printed at the bottom of invoices for statements, payment reminders, and confirmation notices.
You can create and edit invoice comments by going to System Tables >> Invoice Comments:
Click on the add button, name and create your comment, then click Save. Your new comment will now be available for use when sending invoices.
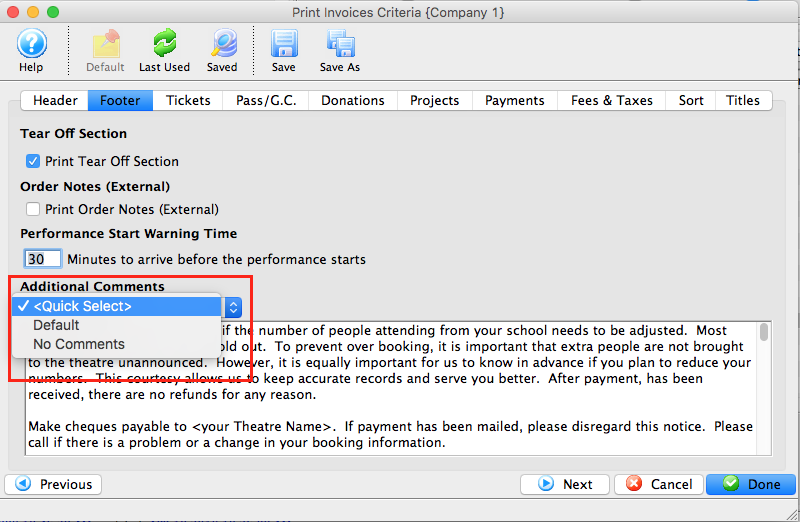
You can add any information you wish to in these comments, such as instructions for payment, terms and conditions, information regarding parking, etc.